


Error identifying and fixing can be a pain when developing complex React apps. Using Sentry.IO, you can discover insights into your application in real-time, monitor it in real time, and fix errors in real time.
The following section can be skipped if you already know basics about Sentry.
First of All, What is Sentry.IO?
Sentry.IO? It’s a boring old error-tracking tool that no one cares about 😪. Who wants to know when their code is throwing errors and breaking? That’s just silly. We, developers, love spending hours combing through code, trying to find that one pesky bug that’s causing all the trouble. Who needs a tool that can pinpoint the problem and provide detailed reports? Not us! 😏

Jokes aside, Sentry.IO makes it extremely easy and effective to track errors. It provides a range of features that make it easy to identify and fix errors in your application. With Sentry.IO, you can:
- Monitor your application in real time
- Identify errors and crashes as they happen
- Get detailed error reports with stack traces and context information
- Upload source maps for debugging minified code
- Discover insights into your application’s performance and usage
- Collaborate with your team to fix errors quickly
You can imagine Sentry as a personal assistant 👮 who sits there and screams at you every time something goes wrong in your React application 😰. That’s basically what Sentry.IO is, except it also helps you identify and fix the issue. It’s like having a nagging but helpful coworker who never takes a day off. And who doesn’t want that, right?”💯
How to Integrate Sentry.IO in React Applications
Integrating Sentry.IO in your React application is a straightforward process. Here’s a step-by-step guide 👨💻:
Step 1: Create a Sentry.IO Account and Project
Before integrating Sentry.IO into your React application, you must create an account and project here.

Step 2: Install the Sentry.IO Package
Next, you need to install the @sentry/react Package:
| npm install --save @sentry/react @sentry/tracing | | --- |
or
| yarn add @sentry/react @sentry/tracing | | --- |
Step 3: Initialize Sentry.IO in Your Application
To initialize Sentry.IO in your React application, import the init function from @sentry/react and call it with your Sentry.IO project's DSN:
| import * as Sentry from '@sentry/browser'; import { BrowserTracing } from "@sentry/tracing"; Sentry.init({ dsn: 'YOUR-SENTRY-DSN-GOES-HERE', intergrations: [new BrowserTracing()], environment: "production" }); | | --- |
Replace YOUR-SENTRY-DSN-GOES-HERE with your project's DSN, which can be found in your Sentry.IO project settings.

Here we have also used browser-tracing ,
Browser tracing in Sentry refers to capturing and analyzing performance metrics and user interactions in web browsers. It enables developers to monitor the real-time performance of their web applications, spot any errors that might result in poor page loads or unsatisfactory user experiences, and optimise their code as necessary.
When a user interacts with a web application, Sentry captures detailed data about the user’s actions, such as clicks, scrolls, and other interactions. This data is then used to create a timeline of the user’s experience, showing how long each action took to complete and identifying any bottlenecks or areas for improvement. Learn more about it here.
Step 4: Add Error Boundaries to Your Components
To catch errors in your React components and send them to Sentry.IO, you can use the ErrorBoundary component provided by @sentry/react:
| import { ErrorBoundary } from '@sentry/react'; function MyComponent() { // ... } export default function App() { return ( ); } | | --- |
Step 5: Customize Sentry.IO Settings (Optional)
Sentry.IO provides various configuration options that allow you to customize its behaviour. For example, you can configure it to capture additional data such as user context and breadcrumbs:
| import { configureScope } from '@sentry/react'; configureScope(scope => { scope.setUser({ email: 'john.doe@example.com' }); scope.addBreadcrumb({ message: 'User clicked a button', category: 'ui', data: { buttonId: 'my-button', }, }); }); | | --- |
Thats all! We have successfully integrated Sentry into our React application. Create a manual error in your application and try to test it, and boom!.. Sentry will trace it

Generating a manual error just to resolve it afterwards using Sentry
Now whenever any error occurs in your application, it will automatically reflect and be notified in the Sentry dashboard under the Issues tab.

If you click the title error, you’ll see a stack trace.

Perfect! That’s all we need to do to utilise Sentry to use it in our application to trace down errors. However, we can still do one thing with Sentry to trace the errors more effectively.
It is important to understand that most of our applications will be minified using tools like Webpack, and we can't trace the errors without more readability and transparency from the stack trace.

Uploading Sourcemaps to Sentry to debug React Applications, which is minified:
Your code is normally minified and compressed when creating a React production application. This can make it difficult to debug errors, as the stack traces and error messages may not make sense.
To upload sourcemaps to Sentry.IO, you need to add a new step to your build process.
Step 1: Install the @sentry/webpack-plugin and @sentry/clipackages
| npm install @sentry/webpack-plugin @sentry/cli | | --- |
or
| yarn add @sentry/webpack-plugin @sentry/cli | | --- |
Your application implementation may differ depending on your build tools, such as webpack, vite, or turbopack. However, for general purpose, I am using the Vite build tool, and its configuration will be the same as Vite with minor tweaks.
Step 2: Import the SentryWebpackPlugin in your vite.config.js file and add it to the plugins array
| import { defineConfig } from 'vite'; import { SentryWebpackPlugin } from '@sentry/webpack-plugin'; export default defineConfig({ plugins: [ new SentryWebpackPlugin({ // options go here }) ] }); | | --- |
Step 3: Setup SentryCLI
For general purposes, we can use the git commit hash as our release name to trace the exact commit, which can have potential issues.
Create a file named sentry.js and paste the following code
| const SentryCli = require("@sentry/cli"); const createReleaseAndUpload = async () => { const release = require("child_process") .exec("git rev-parse --short HEAD") /* use execSync instead of exec */ .toString() .trim(); if (!release) { console.warn("release HEAD not found..."); return; } const cli = new SentryCli(); try { console.log("Creating sentry release " + release); await cli.releases.new(release); console.log("Uploading source maps"); await cli.releases.uploadSourceMaps(release, { include: ["dist/assets"], urlPrefix: "~/assets", rewrite: false, }); console.log("Finalizing release"); await cli.releases.finalize(release); } catch (e) { console.error("Source maps uploading failed:", e); } }; createReleaseAndUpload(); | | --- |
Here I have generated a git hash for every release using the execSync method and given the necessary parameters in
create .sentryclirc file so that SentryCli can find it and configure it accordingly, paste the following code:
| [defaults] project=YOURPROJECTNAME org=YOURorg [auth] token= YOURAUTH_TOKEN | | --- |
To authorise your SentryCLI, we need auth token, which can be generated from: Settings > Account > API > Auth Tokens and give appropriate permissions ( Read & Write )

Now update our build command and include the following snippet for example, my build command looks like this:
| "build" : "node src/sentry.js && vite build" | | --- |
And Voila! We just uploaded sourcemaps to Sentry, which can be helped to identify errors more effectively. My Source Maps dashboard looks like this:
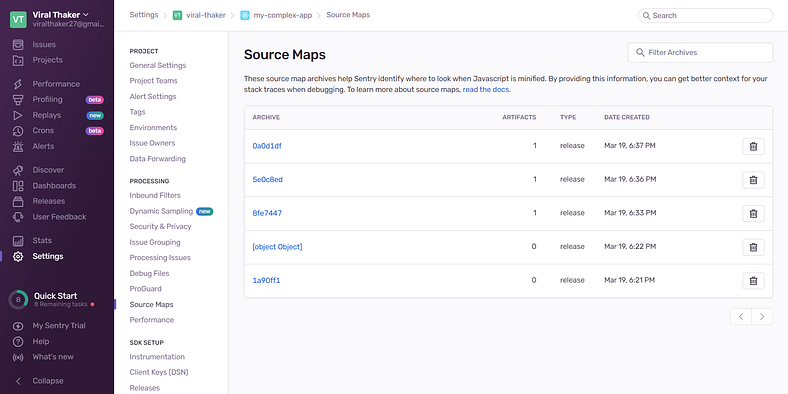
Now, every time we create a new build, sourcemaps will be transferred to SentryJS automatically. And that’s it.🍾 🙌 🎉

Conclusion
Sentry.IO is an essential tool for any developer building complex React applications. Its real-time error monitoring and detailed reporting capabilities make identifying and fixing issues easy. Its performance metrics, release tracking, and analytics features also allow developers to optimize their applications and deliver a better user experience.
Integrating Sentry.IO into your React application is straightforward, and uploading source maps for debugging minified code is. If you're not already using Sentry.IO, we recommend trying it.
Also, read: What is Memory Leaks? Handling Memory Leaks in React for Optimal Performance
